> ## Documentation Index
> Fetch the complete documentation index at: https://docs.pushcash.com/llms.txt
> Use this file to discover all available pages before exploring further.
# Process a new card
## Goal
Enable a user to add a new card and submit a payment for authorization in order to support
* first-time users with no previously-stored payment credentials
* returning users processing a transaction using a new card.
What you need to do
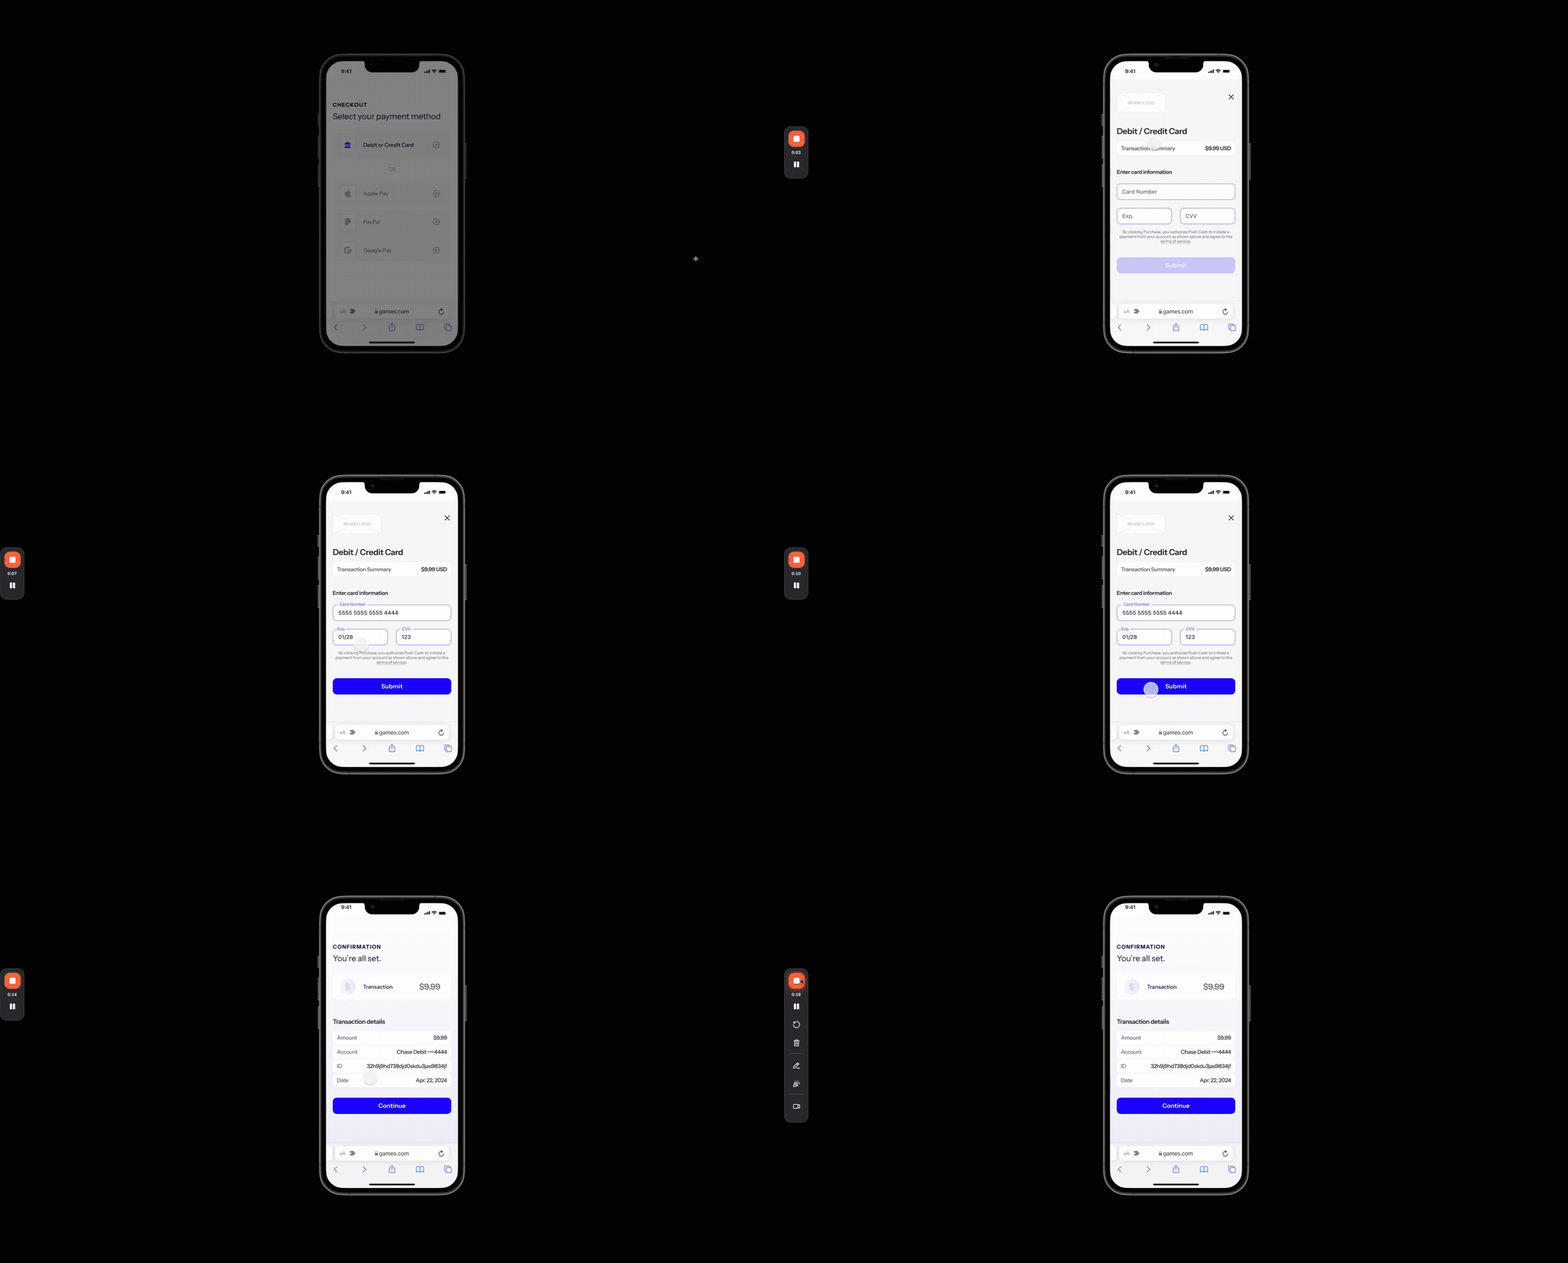
Render the Push Widget on your payment page and enable the user to submit the payment after they have provided valid card information.
Before rendering the widget, ensure you have registered the user by following the [create a user](./create-a-user) guide.
#### How to do it
1. Call the [create-user-url](./apireference/user/create-user-url) endpoint with the user ID and payment direction.
2. Render the widget to the payment page using the returned `url`.
Example code to render the user widget to an element on the page and enable a submit button once the user provides valid card information.
```js theme={null}
const submitButton = document.querySelector('#submit-button');
submitButton.disabled = true;
const widget = new window.PushCash.Widget({
// where to render the widget on the page
selector: '#payment-container',
// the url returned from create-user-url endpoint
url: 'https://cdn.pushcash.com/widget/?param=1¶m=2',
// the callback which runs once the user provides valid card information
onValid: () => {
// enable the submit button in the callback
submitButton.disabled = false;
},
});
```
The widget automatically validates the user's card information and invokes the `onValid` callback when the form is complete. For full widget customization options (e.g. colors, padding, typography) see the [JS SDK Reference](./sdk#widget)
## Step 2: Submit the payment for authorization
What you need to do
When the user submits the payment, call the widget to tokenize the user's card information and submit it to the authorization engine.
#### How to do it
1. Generate a token from the widget.
2. Make an authenticated request to [authorize-payment](./apireference/authorization/authorize-payment) with the payment details (amount, direction, currency) and tokenized card data.
3. Display the result (approved or declined) based on the authorization response.
Before calling the authorization endpoint, we recommend that you commit your internal transaction record to the database to avoid potential race conditions when processing webhooks. See [Independent Ordering](./enabling-webhooks#independent-ordering) for details.
Example code to generate a token from the widget
```js theme={null}
const submitButton = document.querySelector('#submit-button');
submitButton.addEventListener('click', async () => {
try {
const { token } = await widget.tokenize();
console.log('Token received:', token);
// Send token to your backend to authorize payment
} catch (err) {
console.error('Tokenization failed:', err.message);
}
});
```
```bash Create User URL theme={null}
curl --request POST \
--url https://sandbox.pushcash.com/user/{id}/url \
--header 'Authorization: Bearer ' \
--header 'Content-Type: application/json' \
--data '
{
"direction": "cash_in"
}
'
```
```bash Authorize Payment theme={null}
curl --request POST \
--url https://sandbox.pushcash.com/authorize \
--header 'Authorization: Bearer ' \
--header 'Content-Type: application/json' \
--data '
{
"amount": 2500,
"currency": "USD",
"direction": "cash_in",
"tag": "your-internal-transaction-record-id",
"token": "token_mbDRHFi3dxIZEtykHsgUGC"
}
'
```
```json Create User URL - 200 OK theme={null}
{
"url": "https://cdn.pushcash.com/widget/?param=1¶m=2¶m=3"
}
```
```json Authorize Payment - 200 OK theme={null}
{
"id": "intent_sandbox_mbDRHFi3dxIZEtykHsgUGC",
"amount": 2500,
"direction": "cash_in",
"currency": "USD",
"credential": {
"display_name": "Chase Checking",
"last4": "6018"
}
}
```
```json Authorize Payment - 401 Unauthorized theme={null}
{
"id": "intent_sandbox_mbDRHFi3dxIZEtykHsgUGC",
"status": "declined",
"decline_reason": "insufficient_funds"
}
```
## Integration checklist
* Submit your internal transaction record identifier in the `tag` field of the [authorize-payment](./apireference/authorization/authorize-payment) request
* Simulate an approved transaction using test-card `5555 5555 5555 4444`
* Simulate a declined transaction using test-card `5999 9919 6976 9266`
## Next steps
Now that users can add new cards and make payments, learn how to process a transaction using a previously-stored card.